What are the main differences between the ClearView® Uterine Manipulator and the RUMI® II Manipulator?
Here at Hallmark Surgical, we often get asked – what are the main differences between the ClearView® Uterine Manipulator and the RUMI® II Manipulator? Therefore, we have put together this detailed comparison, including features, pricing, and pros & cons of the ClearView® and RUMI® II, to help you decide which is best for you.
The main features to consider when choosing a Uterine Manipulator are as follows:
- Range of tip movement
- Tip sizes and Colpotomy Cup sizes
- Assembly
- Ease of use
- Hygiene or cross-contamination risk
- Price
- Ease of ordering and inventory management
Both devices are available in two versions:
- Manipulator for standard procedures
- Manipulator with occluder balloon and colpotomy cups for performing TLH’s.
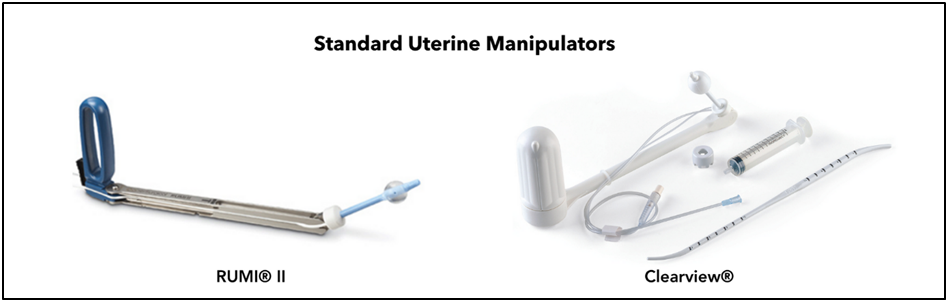
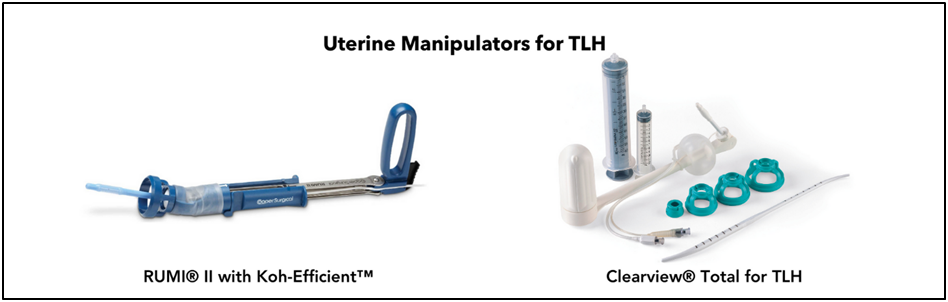
This article focuses primarily on the TLH version. Let’s discuss further, each of the features listed above.
Range of tip movement:
The range of tip movement is important for a Uterine Manipulator to enable greater visibility and access. RUMI® II provides 140° of total tip movement – 90° anteversion and 50° retroversion as well as lateral motion.
The ClearView® provides 210° of total tip movement, the greatest range of motion of any Uterine Manipulator – 120° anteversion and 90° retroversion as well as lateral motion. This range of movement provides superior visibility and access to the posterior cul-de-sac and perivascular space.
An excellent degree of anteversion is ideal for hysterectomies and complex endometriosis such as rectovaginal disease; when you need a good level of anteversion to get at the back of the cervix and overlying the rectum for suitable dissection. It also helps manoeuvre into the correct plane for that type of surgery.
Other procedures that benefit from the excellent range of motion include – Salpingectomy, Ectopic pregnancy, Adhesiolysis and other Laparoscopic procedures. In cases of severe endometriosis, a good level of uterine mobilisation and elevation is required, especially when the disease affects the recto-vagina and cul-de-sac.
Tip sizes and colpotomy cups:
The RUMI® II has six different tip sizes – 3.75cm, 6cm in two different diametres, 8cm, 10cm, and 12cm. These are available to purchase as required, in boxes of 5 units. The Koh-Efficient™ (colpotomy cup and occluder balloon component) has four size options – 2.5cm, 3cm, 3.5cm, and 4cm. Again, these are available to purchase as required, in boxes of 5 units.
For the ClearView® – the tip is part of the ClearView® device rather than an additional component to attach. The ClearView® device comes in two different tip sizes, and each device is supplied with a 1cm spacer so you can reduce the tip length by 1cm. This gives you, in effect, four tip sizes to choose from. The more common choice is the 6/7cm model; there is also an 8/9cm model. Each ClearView® device is supplied in a sterile kit that includes three different colpotomy cups – 3cm, 3.5cm, and 4cm.
Assembly:
To assemble the RUMI® II – you require three components – firstly, you have the main body, a reusable stainless steel item. Secondly, you need a disposable Tip. Thirdly, the Koh-Efficient™ (the colpotomy cup and occluder balloon disposable unit). These are all stocked as separate items in various sizes to be selected before the procedure.
To assemble – firstly, choose the correct tip size based on the uterus sounding, place it on the handle and gently twist 180° to lock into place. Next, insert the tubes into the Catheter Management System on either side of the handle. Then, guide the Koh-Efficient™ assembly over the tip you have just placed on the RUMI® II handle, match the white arrow on the Koh-Efficient™ to the black arrow on the RUMI® handle and snap it into place. Next, confirm that the Koh-Efficient™ is resting on top of the handle rails and then pull back until the Koh-Efficient™ is around the handle and locked in place (you will hear a click). You are now ready for insertion.
The ClearView® is an all-in-one device with the tip and die injection tubes part of the main body of the ClearView®. The ClearView® is supplied in a kit complete with all items required for the procedure, ready to use, including a 10ml Syringe, 60ml Syringe, Uterine Sound-Dilator, a tip spacer and three different sized Colpotomy cups. (When using the RUMI® II, these items have to be used as separate off-the-shelf items).
To assemble the ClearView® for TLH, choose the correct size of Colpotomy cup from the sterile tray and place it over the deflated ClearView® tip until it touches the tip support (or spacer if used). Then, twist clockwise until it snaps into place. You are now ready to insert. If you decide a different size cup is better, you can remove the one fitted and replace it with another one from the kit.
This ease of handling and set-up allows technicians and operators of various experience to prepare the ClearView® for insertion.
Ease of use:
The RUMI® II has a ratcheted locking handle controlled by depressing the trigger. Turning the handle grip while depressing the trigger permits movement of the tip. When the trigger is released, it locks into the desired position.
To antevert the uterus – depress the trigger and turn the handle clockwise. Then, release the trigger to lock it in place. To retrovert the uterus – depress the trigger and turn the handle grip counterclockwise. Then, release the trigger grip to lock it into place.
The ClearView® has been designed for single-handed use without needing an assistant, which is beneficial when you don’t have many assistants or have a junior assistant who doesn’t have experience in the complex procedure you’re doing. The handle is self-locking at any position – let go of the handle, and it will lock in that position, holding the uterus in place. Clockwise rotation of the handle elevates the uterus to the anteverted position. Counterclockwise rotation of the handle retroverts the uterus. Let go of the handle at any point, and it will hold your position for you. Move laterally by directing the handle to one side or the other. This ease of positioning and locking allows you to use the ClearView® as a robust second port to move the uterus in different directions so you can use your advanced energy device, for example.
Hygiene, Cross-contamination risk:
Many manipulators are not designed for modern-day surgery having small obturators or channels which cannot be reliably decontaminated. The ClearView® Uterine Manipulator is entirely single-use and is disposed of without disassembly once used. This eliminates all cross-contamination risk.
On the RUMI® II Manipulator, the tips, and the Koh-Efficient™ colpotomy cup and occluder balloon component are disposable, but the shaft/handle with the dye injection tubes and snap drum that the tip connects to is reusable and requires sterilisation between each use. With the moving parts, small lumens, crevices and mated surfaces, decontaminating the RUMI® shaft is time-consuming, and whether the cross-infection risk has been reliably eliminated may be questionable.
Price:
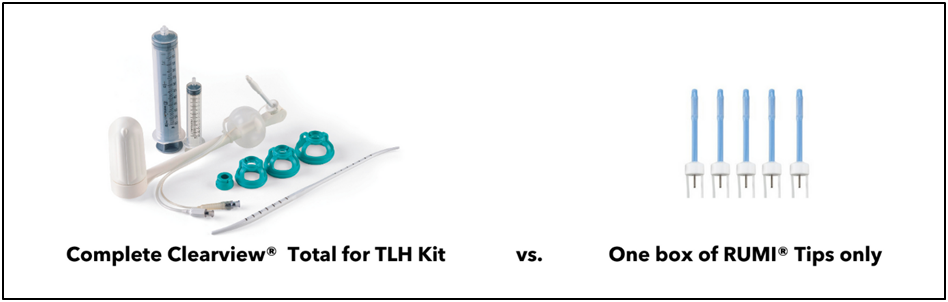
The ClearView® rates quite competitively compared to the RUMI® II. The price for a complete ClearView® Kit, including a 10ml Syringe, 60ml Syringe, Uterine Sound-Dilator and 3 x Colpotomy Cups (see image below), is comparable in price to one box of disposable RUMI® tips only (see image below). On top of this, you have the reusable RUMI® shaft, the Koh-Efficient™ colpotomy cup and occluder balloon component, and the other items required for the procedure, which need to be used as separate off-the-shelf products when using the RUMI® II for a TLH.
Ease of ordering and inventory management:
An inventory benefit of the ClearView® is that you only have to stock a maximum of four line items or SKUs – 2 x standard models and 2 x TLH models. In practice, most hospitals only stock one of each model as this covers nearly 100% of procedures. Each kit includes the ClearView® plus all accessories you require for the procedure.
With the RUMI® II, you can carry up to 14 line items on top of the reusable RUMI® II handle shaft – 6 tip sizes, 4 Koh-Efficient™ sizes, 10ml syringe, 60ml syringe, uterine sound and uterine dilator. Another way of looking at this is that the RUMI® II has an extra three sizes of tips available (12cm, 10cm and 3.75cm) and the additional 2.5cm Koh-Efficient™ option. It does pay to consider the minimum order quantity of the RUMI® tips and Koh-Efficient™ colpotomy cup and occluder balloon components – a box of 5ea. Some sizes are not commonly used and may expire before you can use them all.
The decision on which Manipulator is best for you falls into a few easy categories:
- Ease of use
- Range of tip movement for effective manipulation
- Fully disposable versus reusable/single-use combination
- Price
In summary, it’s up to you to choose which Manipulator is best for you. You can view Instructions for Use and videos for both the RUMI® II and the ClearView® on the links below.
ClearView® Total for TLH:
IFU: https://www.hallmarksurgical.com/product/clearview-total-manipulator/
Video: https://www.hallmarksurgical.com/resources/?post_name=&categories=video&tags=any
RUMI® II:
IFU: https://www.hallmarksurgical.com/wp-content/uploads/2022/09/0d87901f-8032-4a1e-967e-dfa0515e4334_RUMI-II-Procedure-Guide.pdf
Video: https://www.youtube.com/watch?v=ueZ2Ea-r0gl
A surgeon’s testimonial and description on using the ClearView® can be viewed on this webinar link “Manipulating the Uterus, Best practices in Gynaecological Procedures” presented by Mr. Fevzi Shakir, BSc(Hons) MBBS MRCOG MSc in conjunction with Laborie: https://education.laborie.com/manipulating-the-uterus-best-practices-in-gynaecological-procedures?submissionGuid=615b1c23-fe5f-4bb7-a23f-66398b3010e8
Should you wish to try a sample of the ClearView® or discuss any questions with one of our Product Specialists, simply reach out to us here.